
 Volodymyr Lukaniuk

A dormer leaking into the room behind it is almost never a shingle problem. The water comes in at a joint, where the little roof and walls of the dormer meet the big roof of the house, and on most dormers the side walls are the usual culprit, followed by the two front corners. Where the stain shows up inside tells you which joint to look at, and a garden hose can confirm it in about an hour.
A dormer is the box with a window that sticks out of a sloped roof. It has a roof of its own, a front wall, and two triangle-shaped side walls that builders call cheek walls. Every place one of those parts meets the main roof is a seam that metal flashing has to cover, and a typical gable dormer has five of them.
The five joints on a dormer, from most to least likely
The side walls
Along each cheek wall, a small bent piece of metal called step flashing should sit under every row of shingles and turn up the wall behind the siding. One missing, rusted or face-nailed piece lets water run behind the next one down. Two side walls, often 6 to 10 feet each, give water the most chances.
The two front corners
Where the cheek wall turns into the front wall, the metal has to wrap a corner that one flat piece cannot follow. Builders cut and fold it, and the cut is where water finds its way in.
The apron under the front wall
A long strip of flashing runs across the bottom of the front wall and lies over the shingles below. If it is too short, or the shingles were run up over it, water from the window and wall soaks into the deck.
The window itself
Old glazing, cracked trim and a failed sill joint leak water that looks exactly like a roof leak once it reaches the drywall.
Where the dormer roof meets the main roof
On a gable dormer that means two short valleys. On a shed dormer, the flat-topped kind, it is the joint at its high end. Leaves and snow collect here first.
Match the stain inside to the joint outside
Start inside, because the stain is free information. Water moves downhill and along framing before it shows, so read the table as a starting point, then confirm it outside. Our article on tracing a roof leak from a ceiling stain covers how far a drip can travel along a rafter.
| What you see inside | Joint to suspect | What to look for outside |
|---|---|---|
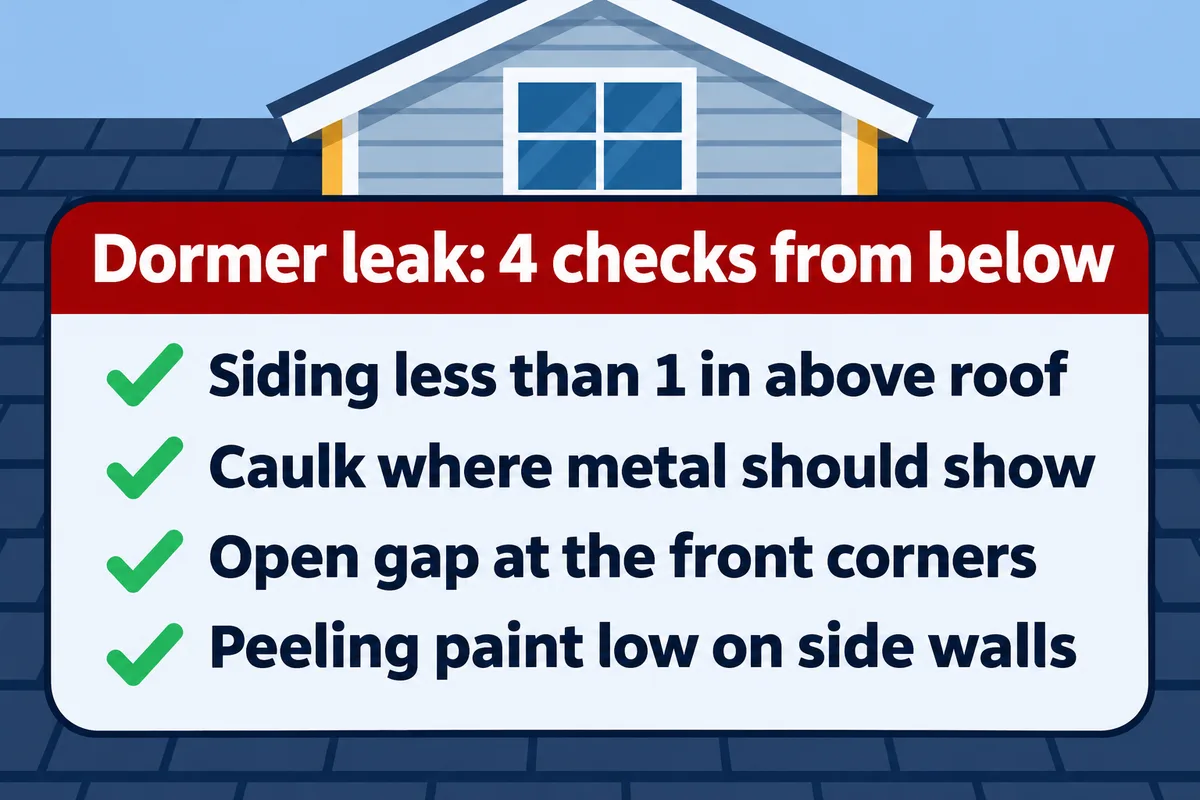
| Stain along the sloped ceiling or short knee wall on one side of the dormer room | Step flashing on that side wall | Siding sitting right on the shingles, a bead of caulk in place of visible metal, rust streaks |
| Wet drywall at a bottom corner of the window, or a damp floor under it | A front corner, or the apron | A dark gap or open fold where side wall meets front wall, apron metal that stops short |
| Drips only when rain blows hard from one direction | The window, or the side facing the wind | Cracked trim, open caulk joints at the window frame, missing siding pieces |
| Stain on the dormer room's ceiling where it meets the main part of the house | The dormer valleys, or the top of a shed dormer | Leaves packed in the valleys, worn or curled shingles in the valley line |
| Water only on melt days in January and February | Snow trapped on the uphill side of the dormer | A pile of snow or an ice ridge right behind the dormer after a storm |
That last row is a snow problem as much as a flashing problem. The dormer blocks snow sliding down the main roof, the pile melts from the warm room side, and the water backs up under the shingles. Our guide to ice dams and the real fix for them explains why venting and insulation matter there more than any sealant.
Why the side walls fail more than anything else
The side walls are built from the most small pieces, and they depend on two trades getting along: the roofer who lays the step flashing and the siding installer who covers its top edge. The US Department of Energy's Building America Solution Center sets out the minimums in its guide to step and kick-out flashing at roof-wall intersections:
- Each piece of step flashing reaches at least 4 inches up the wall and 4 inches out onto the roof deck.
- Metal flashing is corrosion resistant and at least 0.019 inch thick, which is 26-gauge galvanized steel.
- The pieces overlap like shingles, and the house wrap laps over their top edge.
- The siding stops at least one inch above the roof surface.
That one-inch gap is the easiest thing to check from your lawn. Siding that sits on the shingles wicks water up into itself, and the wood behind it stays wet. The same guide is blunt about how long that can go unnoticed:
"While older wood siding would show evidence of this water intrusion by peeling paint, new wall claddings like fiber cement, vinyl siding, and brick veneer can mask the evidence for years."Building America Solution Center, US Department of Energy
The other common cause is a past re-roof. Step flashing is tucked behind the siding, so a crew in a hurry leaves the old pieces in place, shingles up to the wall, and runs a bead of caulk along the joint. It looks tidy for a year or two. Then the caulk shrinks, and the dormer starts leaking on the same side every hard rain. We cover the same failure on other walls in why flashing causes most roof leaks, and where a side wall ends above a gutter, the piece at the bottom is explained in our article on kickout flashing.
A hose test that names the joint
If the stain alone does not settle it, a controlled soak will. You need a helper inside the dormer room with a flashlight, a phone each, and a dry day. Only do this from a low, walkable roof or from a window you can reach the joint through. On a steep or second-story dormer, leave the roof to us.
- Start at the lowest joint, the apron across the front. Run the hose gently over it, never spraying uphill under the shingles, for 10 minutes while your helper watches inside.
- Nothing yet? Move to the bottom 3 feet of one side wall and soak it for 10 minutes. Then the next 3 feet up, and so on to the top.
- Repeat on the other side wall.
- Soak the valleys or the high joint of the dormer roof next.
- Spray the window last, on its own. If water shows only now, the roof is fine and the window or its trim is the leak, which is a job for our window replacement crew rather than a roofer.
The order matters. Testing from the bottom up means water you put on a higher joint cannot be blamed on a lower one, so the first section that makes your helper call out is your leak.
What the repair looks like, and what it costs
A dormer side wall cannot be fixed properly from the roof side alone. The bottom courses of siding have to come off so the step flashing can be replaced piece by piece, then the siding goes back up with its one-inch gap. That is why it helps that we do both roofing and siding repair: one crew opens the wall and closes it, and nobody has to wait for another trade.
A sealant patch on the joint
$50 to $150. It buys you a season while you plan the real repair. Sealant over flashing that is missing or rusted will open again.
New flashing on one side wall or the front
Our range for new step, valley or counter-flashing is $300 to $1,200. Siding comes off and goes back. If the sheathing behind it has rotted, that is priced once the wall is open and we can see how far it goes.
New flashing on the whole dormer during a re-roof
Every dormer joint gets new metal as part of the tear-off, so it costs far less than doing it as a separate job. If your roof is near the end of its life anyway, this is the time.
Frequently asked questions
Can I just caulk along the dormer side wall?
As a stop-gap on a dry day, yes. Caulk does not replace step flashing, and if the pieces under the shingles are missing or rusted, the leak comes back within a year or two.
Why did my dormer start leaking right after a new roof?
Most often the old step flashing was left in place or the joint was sealed with caulk instead of new metal. Call the installer first under their workmanship warranty, with photos of the stain and the outside joint.
Does homeowners insurance cover a leaking dormer?
Damage from a dated wind or hail storm, such as torn flashing or siding pulled loose, can be covered. A slow failure from old caulk or rusted flashing is treated as wear. We document the damage and write the repair estimate, and our partner, the licensed Illinois public adjuster State Adjusting Services, can represent you on the insurance claim.
Got a stain under a dormer and no idea which joint it is? Book a free inspection and we will find the joint and show you photos of it, seven days a week during business hours.